
     
|
|
|
Newly Added Knit Patterns
Sweaters Scandinavian Designs | Volume 103 | Doreen Knitting Books

Sweaters, Scandinavian Designs
Volume 103
Doreen Knitting Books
Original Copyright 1953
Copyright Information
ARMSTRONG, NELL ©
Doreen sweaters. Scandinavian designs. Vol. 103.
10 p. © 30Dec53; A119663.
No renewal.
  |
  |
  |
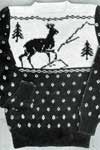
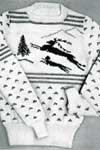
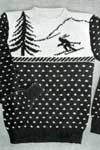
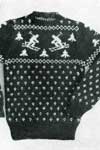
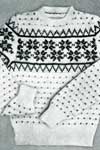
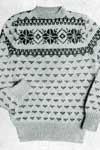
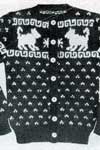
Patterns Included:
Three Men's Sweaters, Boy's or Girl's Sweater, two Ladies' Sweaters, two Child's Cardigans. FOLLOWING DIAGRAMS: Each square on the diagram represents one stitch. A square marked with an X means a stitch of the color which this symbol represents. On a knit row, you follow the diagram from right to the left and on purl rows, from left to right of diagram.
ADJUSTMENTS IN LENGTH OF SWEATER: The correct length of the sweater and of the sleeves should be made in the all over patterns. Add or subtract a number of patterns.
KNITTING WITH TWO COLORS: When starting to use a second color, do not tie in. Leave an end of about 4 inches long, hanging loosely. These loose ends are fastened with a tapestry needle on the wrong side of work when the piece is completed. Always carry along loosely the yarn that is not being used by twisting it every 3rd or 4th stitch around the yarn that is being used. This avoids long loops at the back of work.
NOTE: If the larger needle is used for binding off the neck bands and casting on the sleeves it will prevent the neck or wrist openings from being tight.
GAUGES: If you knit with a loose tension, you should use a size smaller needle than called for, if you knit with a tighter tension, use a larger needle. To know what exact size the sweater will be, divide the number of stitches at the widest part by the number of stitches that you have per inch. This gives you the measurement in inches.
ASSEMBLING: Fasten all loose ends on wrong side of work. Use a single strand of yarn and tapestry needle for all sewing. Place the right side of work together and sew shoulder seams and side seams. Sew up the sleeves and sew into armhole, matching the underarm seams. Then finish the neck as in the directions. To help keep the shoulders in shape, sew a ½-inch tape along inside of shoulder seams.

| Pattern Categories Browse the categories to help you find the patterns you're looking for. |
||
|
||

|


