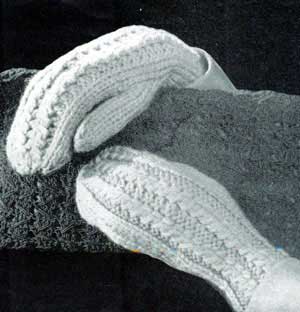
Ladies Mocked Stitch Cable Mittens Pattern #91

REQUIREMENTS: Two 2 – ounce skeins Fluffy yarn or Knitting Worsted used two strands.
NEEDLES: 1 – pr. #10 Single Pointed Needles.
RIGHT MITTEN: Starting at the cuff, cast on 26 sts.
1st row – Purl 14 sts; k 2, p 2, k 2, p 2, k 2, p 2.
2nd row – Knit 2 sts; p 2, k the 2nd stitch in the back and leave on the needle, k the first st, slip both loops off the needle, (cable); p 2, cable on the next 2 knit sts as before; p 2, k 14. Repeat row 1 and 2 until you have 7 cable twists ending with row 1.
THUMB INCREASES: work across 12 sts, k 2, inc. in the next st (by picking up the back thread of stitch and knit the st itself), k 1, inc. as before, knit to the end. Next row – Work back as the sts are.
2nd inc.: work across 12 sts, k 2, inc., k 3, inc., work to the end of row. Next row – Work back as the sts are.
3rd inc.: work across 12 sts, k 2, inc., k 5, inc., k to end. Next row – Work back as the sts are.
4th inc.: work across 12 sts; inc., k 7, inc., knit to end of row. Work back as the sts are on the next row.
SEPARATION FOR THE THUMB OPENING: K 2, p 2, cable, p 2, cable, p 2, k 2, place these sts onto a stitch holder; knit across 9 sts; place the remaining sts onto a st holder. Cast on 1 st at the end of the 9 sts; purl back, cast on 1 st at the end of the row. Work back and forth on these 11 sts for 11 rows ending on the wrong side. Knit 2 sts tog., across the next row. Break the yarn leaving enough to sew, draw through the remaining sts and fasten tight on the wrong side and sew up the thumb. Place the sts back on the needle off first st holder, tie yarn at first st; pick up and knit 4 sts at the base of thumb; knit the sts off the 2nd st holder onto the needle. Work back and forth in the pattern until you have 21 cables from the beginning ending with 2nd row of the pattern.
DECREASES AT TIP: K 2, p 2 tog., cable, p 2 tog., cable, p 2 tog., * k 2, k 2 tog., repeat from * to end of row.
2nd row – Work across the row as the sts are.
3rd row – K 2 sts tog., across the row. Break yarn leaving 12 inches. Draw through the sts and fasten off on the wrong side. With the same thread sew up the side of the mitten.
LEFT MITTEN: 1st row – P 2, k 2, p 2, k 2, p 2, k 2, p 14.
2nd row – K 14, p 2, cable, p 2, cable, p 2, k 2. Work the rest of mitten to correspond.
Ladies Mocked Stitch Cable Mittens Pattern, No. 91
Two Years Old Mittens Pattern, No. 92
Infants Size Mittens Pattern, No. 93
Infants to 6 Months Mittens Pattern, No. 94
Baby Mittens Pattern, No. 95
Infants to 6 Months and 1 Year Mittens Pattern, No. 96
6 Months to 1 Year Old Pattern, No. 97
Panel Backed Mittens Pattern, No. 98
Men's Mittens Pattern, No. 99
Men's Mittens Pattern, No. 100
Girls and Ladies Mittens Pattern, No. 101
Three Years Old Cabled Mittens Pattern, No. 103
Mittens for 10-12-14 Year Olds Pattern, No. 104
Girls and Ladies Mittens Pattern, No. 105
Childrens Mittens Pattern, No. 106
Four Years Old Mittens Pattern, No. 107A
Six Years Old Mittens Pattern, No. 107B
Eight Years Old Mittens Pattern, No. 107C
| Pattern Categories Browse the categories to help you find the patterns you're looking for. |
||
|
||


